In this tutorial, we'll learn how to easily open multiple images as layers in Photoshop using the powerful yet little-known Load Files into Stack
command. I'll be using Photoshop CC here but this tutorial is fully
compatible with Photoshop CS6 and with earlier versions of Photoshop.
Whether we're compositing images, creating collages or designing
layouts, we often find ourselves with multiple images or files that need
to all end up in the same Photoshop document. And, each image or file
needs to appear on its own independent layer within that document.
The traditional approach is to open each image or file into Photoshop
one at a time and then copy and paste, or drag, each one into your
main document. But unless you're getting paid by the hour, there's a
better, faster way to work. In fact, all we really need to do is tell
Photoshop which images or files we need to open. Then, just sit back and
relax while Photoshop creates a new document, opens all of your images
into that document and places each one on its own separate layer. Let's
see how it works!
Step 1: Select The "Load Files into Stack" Command
With Photoshop open on your screen, go up to the File menu, choose Scripts, and then choose Load Files into Stack. "Stack" means your layer stack, referring to how layers are stacked one on top of the other in the document:
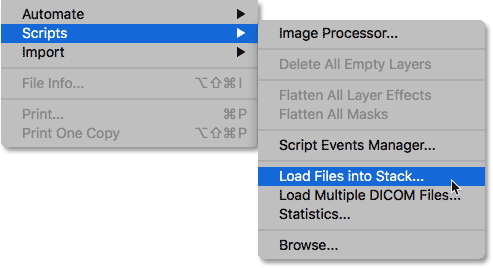
Going to File > Scripts > Load Files into Stack.
Step 2: Select Your Images
This opens Photoshop's Load Layers dialog box:
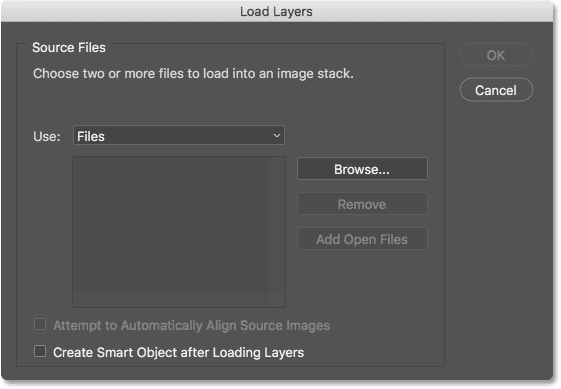
The Load Layers dialog box.
All we need to do here is tell Photoshop which images or files we
need to open, and there's two ways to do it. One is to simply choose a
folder on your computer and then let Photoshop automatically select
every image or file it finds in that folder. The other is to navigate
to a folder but then manually select images or files within the folder
yourself.
To choose a folder and let Photoshop automatically select every image or file within that folder, change the Use option to Folder. Then, to navigate to the folder, click the Browse button:
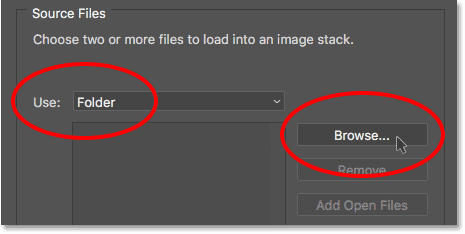
Setting "Use" to "Folder", then clicking "Browse".
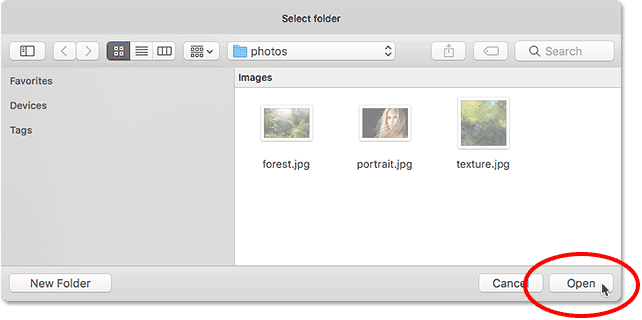
This opens a File Explorer window on a PC or a Finder
window on a Mac (which is what I'm using here). Navigate to the
folder's location on your computer. In my case, my images are all in a
folder named "photos" on my Desktop.
Notice, though, that all of the files within the folder are grayed
out, meaning that we're not able to select them. That's because
Photoshop is going to automatically include every file within the folder. If you're fine with that, go ahead and click OK in your File Explorer window or Open in your Finder window:
Click OK (Win) / Open (Mac) to automatically select all files within the folder.
In my case, I'm going to click the Cancel button for now to close out of the window without selecting anything so we can look at how to select images manually:
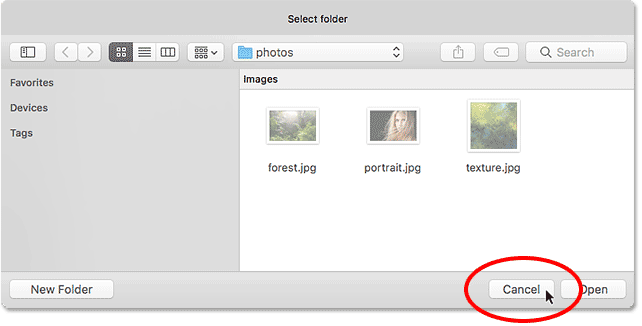
Clicking "Cancel" to close out of the window.
This takes me back to the Load Layers dialog box in Photoshop. If,
instead of selecting an entire folder of images, you want to navigate to
a folder but then select images manually, change the Use option to Files (the default setting). Then, click the Browse button:
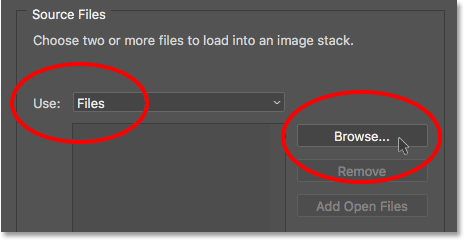
Changing "Use" to "Files", then clicking "Browse".
Just as before, this opens a File Explorer window on a PC or a Finder window on a Mac. Navigate to the folder that holds your images. I'll navigate to the same "photos" folder on my Desktop.
Notice that this time, the files are not grayed out, which means that
we can select just the ones we need. To select files manually, click on
one image to select it. Then, press and hold the Ctrl (Win) / Command (Mac) key on your keyboard and click on the other images you want to open.
In my case, I only have three images in the folder, so I'll select all three of them:
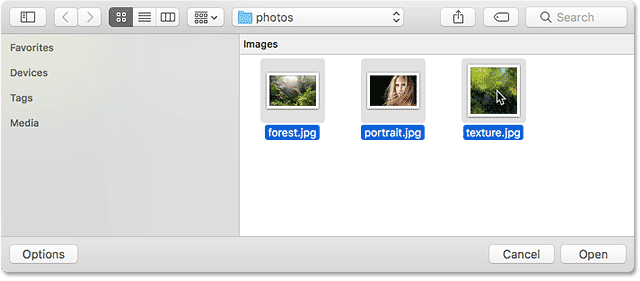
Manually selecting the images I need to open.
The File Names
Before I go ahead and open the images, notice the names of my files
("forest.jpg", "portrait.jpg" and "texture.jpg"). Photoshop will use the
names of your files as the names of your layers, so it can be a good
idea to rename your files before loading them into Photoshop. Of course,
you can always rename your layers later if you need to, but renaming
your files first will save you the hassle:
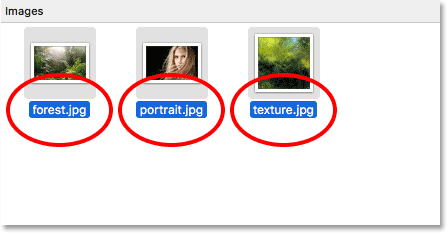
The file names will be used as the layer names.
With your images selected, click OK in your File Explorer window or Open in your Finder window to load the images:
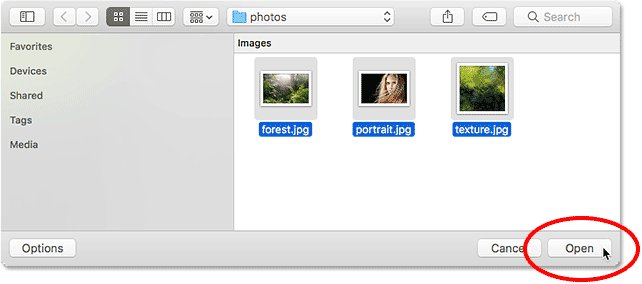
Opening the selected images.
The names of the files you've selected will appear in the Load Layers dialog box:
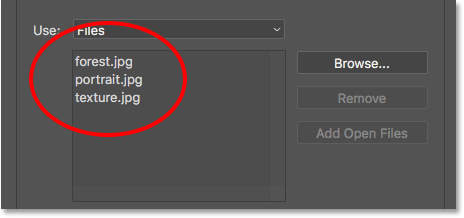
The dialog box shows the names of the files you'll be opening.
Removing A File From The List
If you made a mistake and accidentally selected a file you don't
need, simply click on its name in the list to highlight it. Then, click
the Remove button:
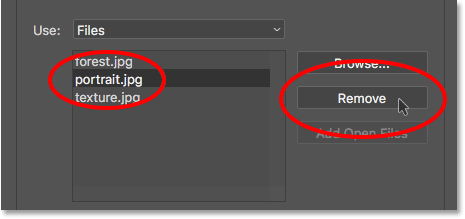
To remove a file, select it, then click "Remove".
Step 3: Click OK To Load The Images Into Photoshop
I'm not actually going to click the Remove button because I want to
open all three of my images. When you're ready to open them, click OK:
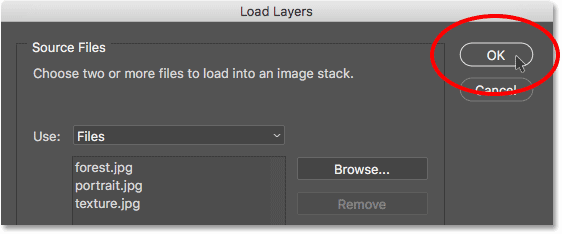
Clicking OK to open the images in Photoshop.
It may take a few moments, but Photoshop creates a brand new
document, loads each image into that document, and places each one on
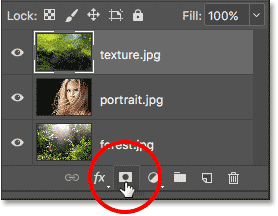
its own layer, as we can see here in my Layers panel.
Notice, as I mentioned earlier, that Photoshop used the name of each
file as the name of its layer. It even included the three-letter file
extension (".jpg") in the name:
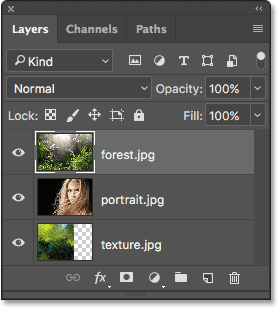
The Layers panel showing all three images on separate layers.
Viewing Your Images
Since my "forest.jpg" layer appears above the other two layers in my Layers panel, the image on the layer appears in front of my other two images in the document (tropical rainforest photo from Adobe Stock):
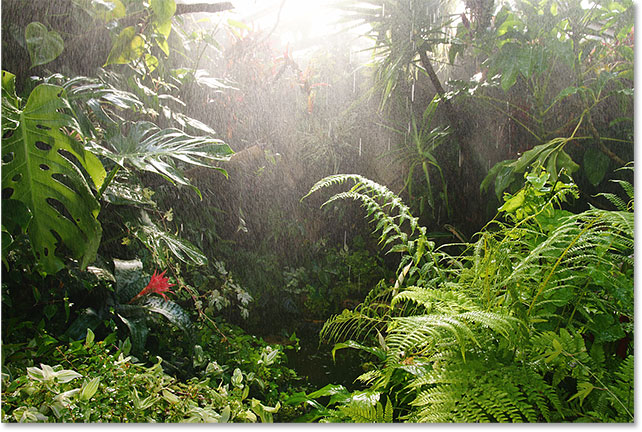
The image on the top layer. Photo credit: Adobe Stock.
To view the image below it (on the "portrait.jpg" layer), I'll turn off the top layer temporarily by clicking on its visibility icon:
Clicking the visibility icon for the top layer to turn it off.
With the top layer turned off, we see my portrait image in the document (portrait photo from Adobe Stock):
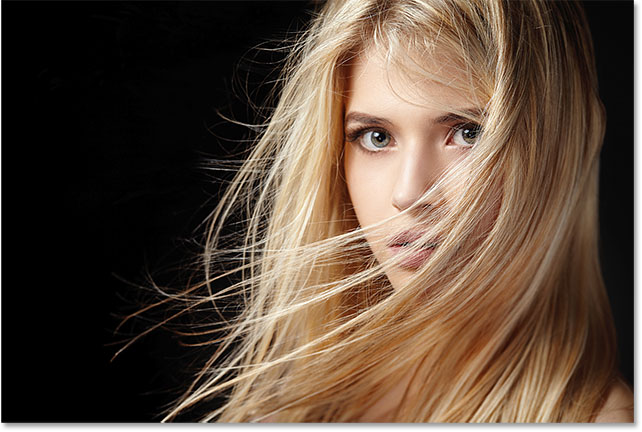
The image on the middle layer. Photo credit: Adobe Stock.
I'll click the "portrait.jpg" layer's visibility icon to turn the middle layer off so we can view the image on the bottom layer:
Turning off the "portrait.jpg" layer.
And here's what the image on the "texture.jpg" layer looks like. Notice the checkerboard pattern to the right of the image. The checkerboard pattern is how Photoshop represents transparency
on a layer. When Photoshop created the new document to hold the images,
it set the Width and Height values of the document based on the width
and height of the largest images.
All three of my photos share the same height, but my texture image is
not as wide as the other two, leaving some blank space on the right of
its layer. Unless all of your images share the exact same width and
height, you'll most likely need to resize some of them after they've
been loaded into Photoshop (texture image from Adobe Stock):
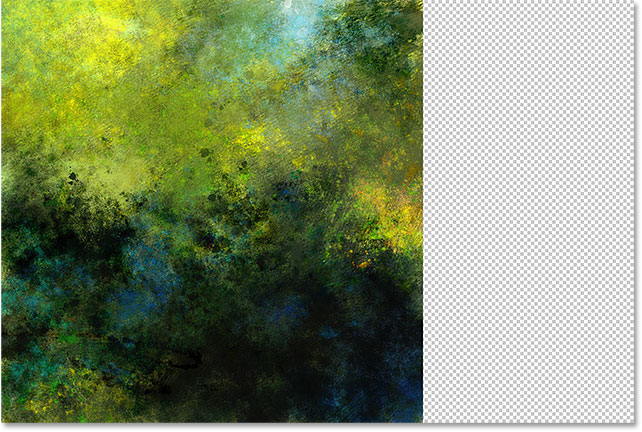
The image on the bottom layer. Photo credit: Adobe Stock.
Blending The Images
At this point, we've learned how to load our images into Photoshop as
layers. But to finish things off, I'm going to blend my three images
together. Since blending images falls outside the scope of this
tutorial, I'll go through the steps fairly quickly.
First, I need to resize my texture image so it fills the entire
layer. To do that, I'll click on the "texture.jpg" layer in the Layers
panel to select it:
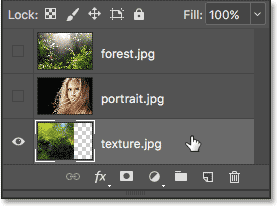
Selecting the "texture.jpg" layer in the Layers panel.
To resize it, I'll go up to the Edit menu at the top of the screen and choose Free Transform:
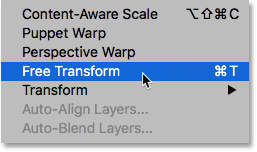
Going to Edit > Free Transform.
This places the Free Transform handles around the image. I'll click on the handle on the right
of the image and drag it further to the right until the image fills the
entire layer. Normally we'd want to avoid resizing an image in such a
drastic way because we'll lose image quality, and also because we're
distorting the photo's original aspect ratio. But in this case, since
I'm using it only as a texture, I can get away with it.
To accept the transformation and close out of the Free Transform command, I'll press Enter (Win) / Return (Mac) on my keyboard:
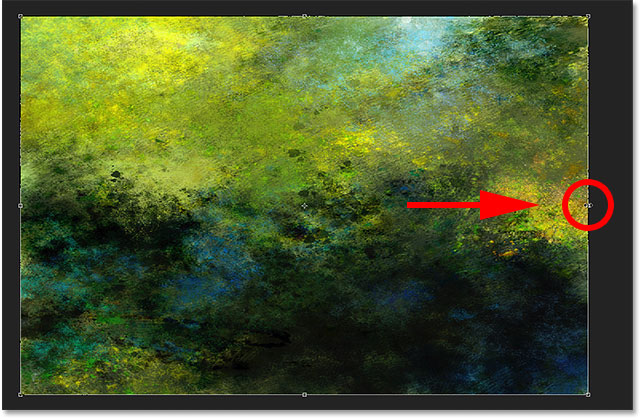
Resizing the texture image with Free Transform.
Next, I'll turn my other two layers back on in the document by clicking on their visibility icons:
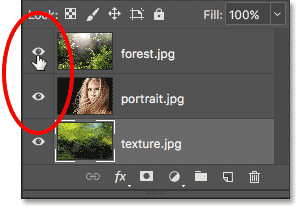
Turning the top two layers back on in the document.
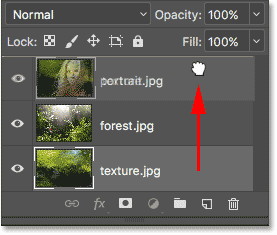
I need my portrait image to appear above my forest image, so I'll
click on the "portrait.jpg" layer in the Layers panel and drag it up
above the "forest.jpg" layer. When a thin highlight bar appears above the "forest.jpg" layer, I'll release my mouse button to drop the "portrait.jpg" layer into place:
Dragging the "portrait.jpg" layer above the "forest.jpg" layer.
Then, to blend the portrait image in with the forest image, I'll change the blend mode of the "portrait.jpg" layer from Normal to Screen:

Changing the layer blend mode to Screen.
The Screen blend mode hides all of the black areas on the portrait layer, then blends the rest of the photo in with the forest image below it:
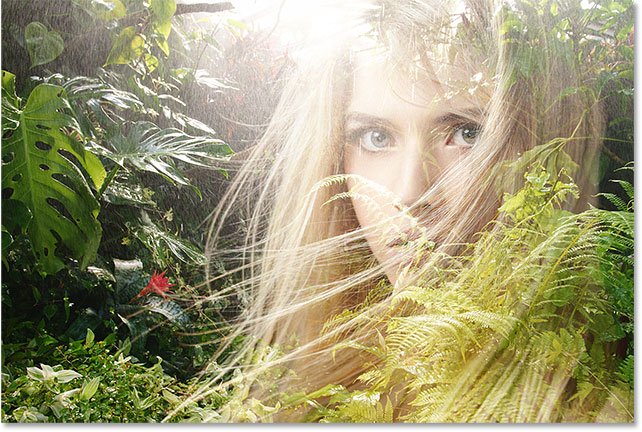
The result after changing the portrait layer's blend mode to Screen.
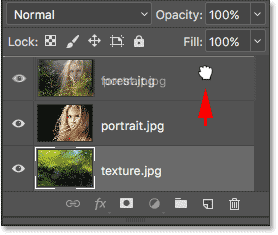
Next, I need to move the texture image above the other two images, so
I'll click on the "texture.jpg" layer and drag it up above the
"portrait.jpg" layer:
Dragging the "texture.jpg" layer to the top of the layer stack.
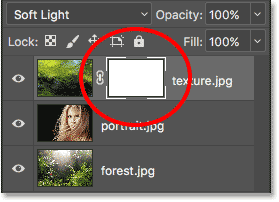
Finally, to blend the texture in with the layers below it, I'll change its blend mode from Normal to Soft Light:
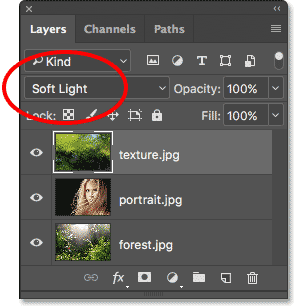
Changing the blend mode of the texture layer to Soft Light.
The Soft Light blend mode
not only blends the texture in with the images but also boosts the
overall contrast by making light areas lighter and darker areas darker.
And, it increases color saturation as well. You can learn more about
layer blend modes in our Five Essential Blend Modes For Photo Editing tutorial:
The result after changing the texture's blend mode to Soft Light.
Using A Layer Mask
The only thing I don't like at this point is that, after blending in
the texture, there's a couple of areas in the bottom half of the image
that are now looking too dark. I'll fix that by hiding the texture layer
in those areas using a layer mask. Again, I'll go
through this quickly, but I'll include a link at the end where you can
learn all about layer masks in Photoshop.
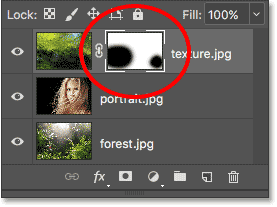
First, with my "texture.jpg" layer still selected, I'll click the Add Layer Mask icon at the bottom of the Layers panel:
Clicking the "Add Layer Mask" icon.
A white-filled layer mask thumbnail appears on the texture layer, letting me know that my mask has been added:
A layer mask thumbnail appears.
I'll select Photoshop's Brush Tool from the Toolbar:

Selecting the Brush Tool.
And since I want to use the layer mask to hide parts of the texture layer, I'll make sure that my brush color (the Foreground color) is set to black:
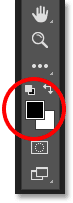
Setting the Foreground color to black.
Then, with my Brush Tool in hand and black as my brush color, I'll
begin painting on the layer mask over the areas that are looking too
dark. I'll start with the shadow area to the left of the woman's hair.
Painting over it with black hides the texture layer in that area,
restoring the previous brightness:
Hiding the texture layer from the shadow area to the left of the woman's hair.
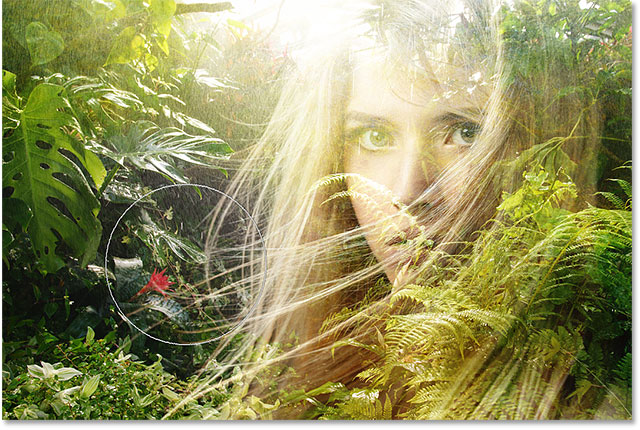
I'll also paint over a smaller shadow area in the lower right of the image which is also looking too dark:
Hiding the texture layer in the lower right.
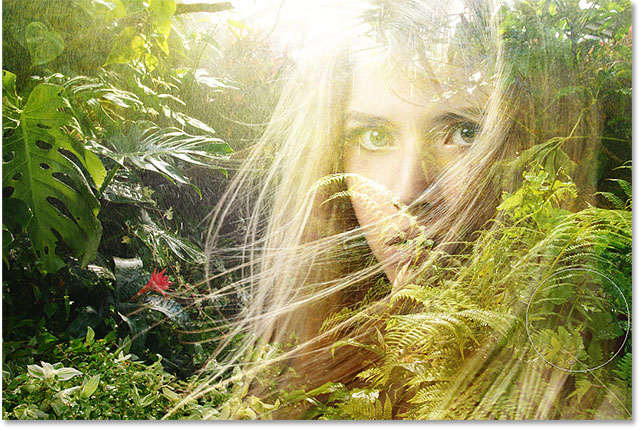
If we look again at my layer mask thumbnail, we can see the two areas
where I've painted on the mask with black. These are the areas of the
texture layer that are no longer visible in the document:
The layer mask thumbnail shows which areas of the layer are now hidden.
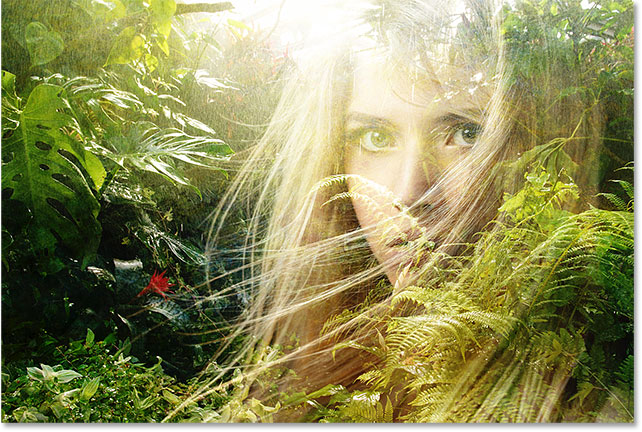
And here, after loading the images into Photoshop as layers, blending
all three layers together using blend modes and then hiding parts of
the texture layer with a layer mask, is my final result. You can learn
all about layer masks begining with our Understanding Photoshop Layer Masks tutorial:

The final result.
No comments:
Post a Comment