In this photo effects tutorial, we'll learn how to easily add rays of
sunlight to an image, a great way to make an already beautiful sunset
photo even more magical. To create the effect, we'll start with
Photoshop's classic Clouds and Radial Blur filters, and we'll take
advantage of Smart Objects and Smart Filters to keep our filter settings
fully editable. We'll then use one of Photoshop's layer blend modes and
a layer mask to blend the light rays in with the original image, and
we'll finish by warming things up using a simple Photo Filter adjustment
layer.
This version of the tutorial has been fully re-written and updated
for both Photoshop CS6 and Photoshop CC (Creative Cloud).
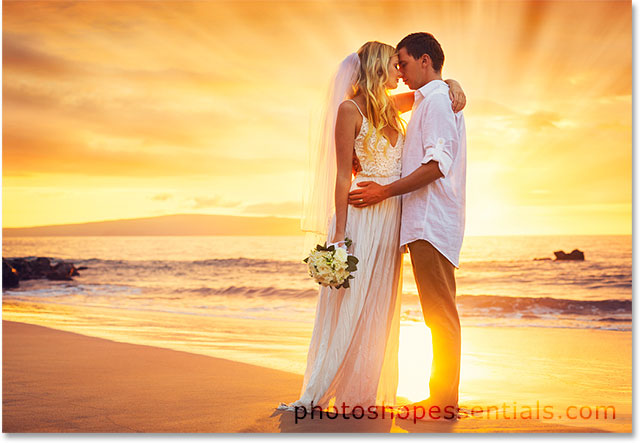
Here's the image I'll be starting with (bride and groom at sunset photo from Shutterstock):

The original image.
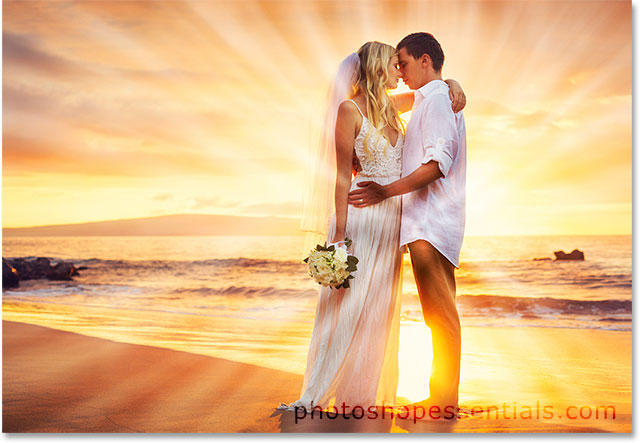
And here's how it will look after adding the rays of sunlight behind the couple:
The final effect.
Step 1: Add A New Blank Layer
With the image newly opened in Photoshop, we can see it both in the main document area and in the Layers panel. It's sitting on the Background layer, currently the only layer in our document:
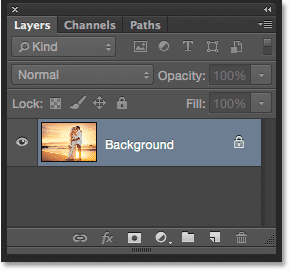
The Layers panel showing the photo on the Background layer.
The first thing we need to do is add a new blank layer. Press and hold the Alt (Win) / Option (Mac) key on your keyboard and click on the New Layer icon at the bottom of the Layers panel:
Clicking the New Layer icon.
This opens the New Layer dialog box, giving us the chance to name the
new layer before it's added. We'll use this layer to hold our effect,
so name the layer "sun rays", then click OK:
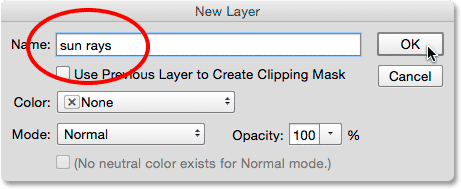
Naming the new layer in the New Layer dialog box.
Photoshop adds the new "sun rays" layer above the Background layer:
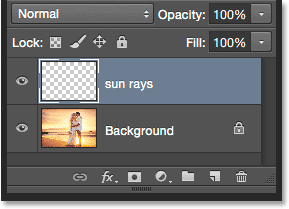
The "sun rays" layer appears.
Step 2: Set Your Foreground And Background Colors To Their Defaults
In a moment, we're going to apply the Clouds filter to our new layer, but first, we need to make sure our Foreground and Background colors are set to their defaults, with the Foreground color black and the Background color white. To quickly reset them, press the letter D on your keyboard (think "D for "Defaults"). If you look at the Foreground and Background color swatches
near the bottom of the Tools panel, you should see the Foreground
(upper left) swatch filled with black and the Background (lower right)
swatch filled with white:

The Foreground and Background color swatches.
Step 3: Apply The Clouds Filter
With the Foreground and Background colors reset, go up to the Filter menu in the Menu Bar along the top of the screen, choose Render, then choose Clouds:
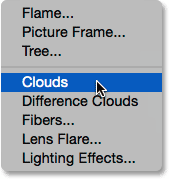
Going to Filter > Render > Clouds.
There are no options to set for the Clouds filter. Photoshop simply
fills the entire layer with what Adobe calls "clouds". They appear in
black and white because that's what we set our Foreground and Background
colors to before applying the filter:
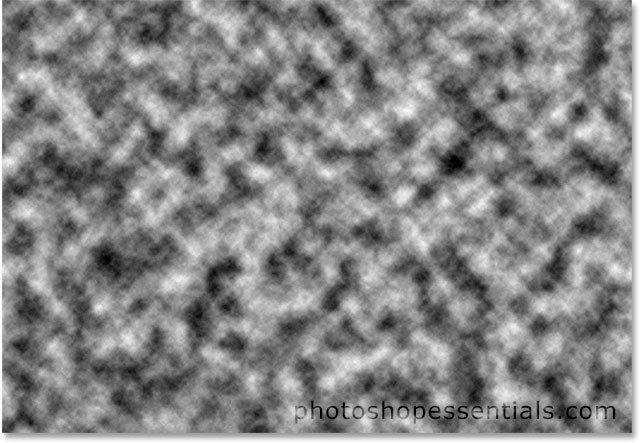
The document after applying the Clouds filter to the "sun rays" layer.
Step 4: Change The Blend Mode Of The Layer To Overlay
At the moment, the "clouds" are completely blocking our image from
view. We need a way to blend them in with the photo, and we can do that
by changing the layer's blend mode.
You'll find the Blend Mode option in the upper left of the Layers
panel. By default, it's set to Normal. Click on the word "Normal" and
change the blend mode to Overlay:
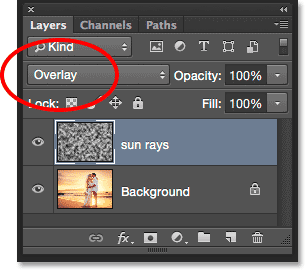
Changing the layer blend mode to Overlay.
The Overlay blend mode
is one of Photoshop's contrast-boosting blend modes, and here, we see
that not only do the clouds now blend in with the image but the contrast
has also increased:
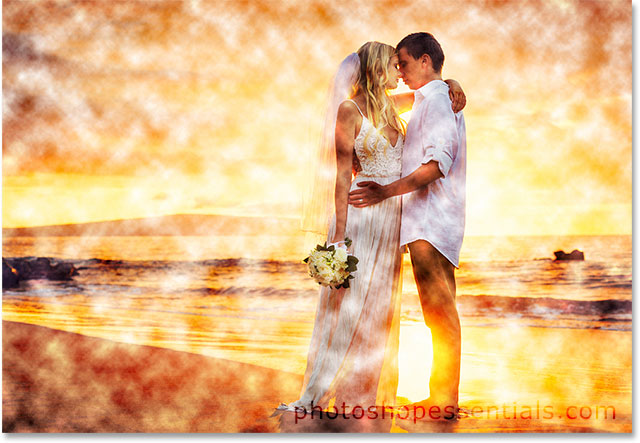
The image after changing the blend mode to Overlay.
Step 5: Convert The Sun Rays Layer Into A Smart Object
To make the clouds look like rays of sunlight, we'll use Photoshop's
Radial Blur filter. But before we do, let's convert the "sun rays" layer
into a Smart Object. That way, we can apply Radial Blur as a Smart Filter
which will make it much easier for us to experiment with its settings.
With the "sun rays" layer still selected, click on the small menu icon in the top right corner of the Layers panel:
Clicking the Layers panel menu icon.
Choose Convert to Smart Object from the menu that appears:
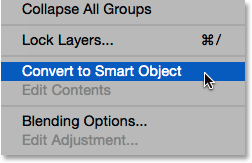
Choosing "Convert to Smart Object".
It won't look like anything has happened to the image, but a small Smart Object icon appears in the lower right corner of the layer's preview thumbnail, letting us know that the layer has been converted into a Smart Object:
The preview thumbnail showing the Smart Object icon.
Step 6: Apply The Radial Blur Filter
Now that we've converted the layer into a Smart Object, go up to the Filter menu at the top of the screen, choose Blur, then choose Radial Blur:
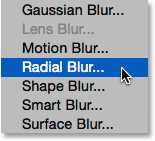
Going to Filter > Blur > Radial Blur.
This opens the Radial Blur dialog box. First, set the Blur Method on the left to Zoom, then set the Quality to Good.
The reason we're not choosing Best for the quality right away is
because it will most likely take a few tries to get the effect looking
just right and running the Radial Blur filter can be an intensive and
time-consuming task. Leaving the Quality option set to Good will let us
test out our settings more quickly (in fact, you may even want to choose
Draft if you're on a slower computer). Once we're
happy with how things look, we can then go back and change the quality
to Best. We'll see how to do that in a moment.
The Amount option at the top controls how much of a
blur is being applied. I'm working on a large image (4200 x 2883 pixels)
so I'll drag the slider all the way to the right to the maximum value
of 100. You may want to choose a lower value for a
smaller image, but don't worry about getting things exactly right for
now. We can easily make changes to the settings and try again:
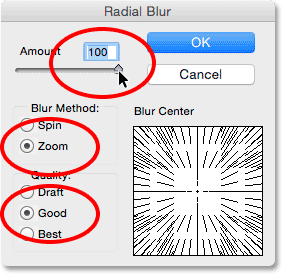
Setting the Blur Method to Zoom, Quality to Good and Amount to 100.
Finally, the Blur Center box is where we set the
location in the image where the blur effect will appear to be zooming
out from. For this effect, we want it to be zooming out from wherever
the sun is sitting in the sky. Simply click inside the box and, with
your mouse button held down, drag the blur center to where you need it.
Unfortunately, Photoshop doesn't make this very easy. There's no preview
option, and it doesn't help that the box is square when your photo is
most likely rectangular. Knowing exactly where to set the center point
is really a trial-and-error, "take your best guess" type of thing. It's
frustrating, but again, we'll be able to easily come back, move the blur
center and try again, so don't worry about getting it perfect.
Since the sun is roughly in the center-right of my photo, I'll drag my blur center to the center-right of the box:
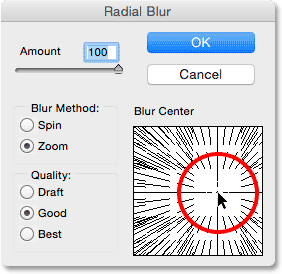
Click and drag to move the center of the blur.
When you're ready, click OK to close out of the dialog box and apply
the Radial Blur effect, transforming the clouds into rays of light. In
my case, I like the strength of the effect so setting the Amount value
to 100 was a good choice, but the zoom isn't centered correctly. The
light rays should be coming from the sun, but instead, they're a bit too
far to the left:
The center of the zoom effect needs to be moved to the right.
Step 7: Re-Open The Radial Blur Smart Filter And Change The Settings As Needed
Fortunately, because we applied the Radial Blur filter to a Smart
Object rather than a normal layer, it was applied not as a normal filter
but as a Smart Filter, which makes it easy to go back
and make whatever changes we need. If we look in the Layers panel, we
see the Radial Blur filter listed as a Smart Filter directly under the
"sun rays" layer. To re-open its dialog box, just double-click on it:
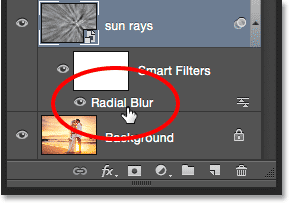
Double-clicking on the Radial Blur Smart Filter.
When the dialog box re-opens, go ahead and make any changes you need.
You can do this as many times as you like because Smart Filters in
Photoshop are non-destructive so you never need to worry about
losing image quality. In my case, I'll leave the Amount value set to 100
but you may want to try a different value with your image. The only
change I'll make is that I'll click and drag the blur center over a bit
to the right to hopefully line it up this time with the sun. Click OK
when you're ready to close out of the dialog box and apply the filter
with your new settings:
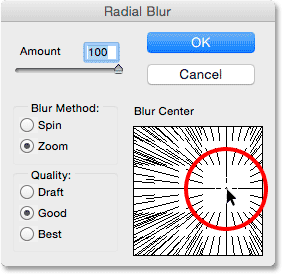
Moving the blue center and trying again.
Step 8: Change The Quality To Best
If the effect still doesn't look right after the second try, don't
feel bad. Blame Adobe for not making it easier (that's what I do), then
just double-click on the Radial Blur Smart Filter in the Layers panel to
re-open its dialog box, make your changes, and then click OK to try
again. Repeat as many times as needed. Once you have your blur center
lined up properly in the image, re-open the Radial Blur dialog box and
change the Quality from Good to Best, then click OK to run the filter one last time:
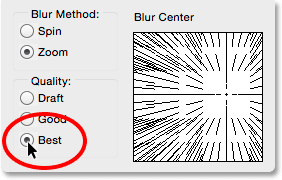
Changing the Quality to Best.
It will take quite a bit longer than before (a progress bar will let
you know how it's going), but when it's done, you'll have rendered the
light rays at the highest possible quality:

The effect after running the Radial Blur filter at the Best quality setting.
Step 9: Add A Layer Mask
We have our light rays, but they're covering the entire image. That
may be what you want depending on your photo, but in my case, it's a
problem. For starters, the rays are shining right through the couple on
the beach. I also want the rays to appear only above the horizon, not below it. To hide the light rays in the areas we don't need them, we'll use a layer mask. With the "sun rays" layer still selected, click on the Layer Mask icon at the bottom of the Layers panel:
Clicking the Layer Mask icon.
Nothing will happen to the image yet, but a white-filled layer mask thumbnail appears on the "sun rays" layer:
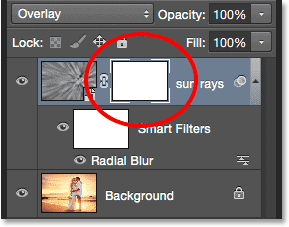
The new layer mask thumbnail.
Step 10: Select The Brush Tool
Click on Photoshop's Brush Tool in the Tools panel along the left of the screen to select it:

Selecting the Brush Tool.
Step 11: Set Your Foreground Color To Black
We're going to use the Brush Tool to paint over the areas where we
want to hide the light rays. To do that, we'll need to be painting with black. Photoshop uses the Foreground color as the brush color, so to quickly make sure it's set to black, first press the letter D on your keyboard. This will set the Foreground color to white, which is the default color whenever a layer mask is selected. Then, press the letter X on your keyboard to swap the Foreground and Background colors, making the Foreground color black.
Again, you can see the current Foreground and Background colors in the color swatches near the bottom of the Tools panel. The Foreground (upper left) swatch should now be filled with black:

The Foreground color is set to black.
Step 12: Choose A Soft Round Brush
With the Brush Tool selected, right-click (Win) / Control-click (Mac) anywhere inside the image to quickly open Photoshop's Brush Preset Picker, then double-click on the soft round brush (first thumbnail, top row) to select it. Double-clicking selects the brush and then closes out of the Brush Preset Picker:
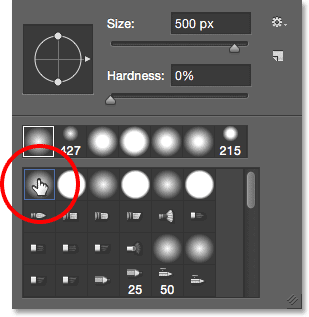
Choosing the soft round brush.
Then, begin painting over any areas where you want to hide the light
rays from view. I'll start by painting over the area below the horizon,
as well as that mountain in the background just above the horizon on the
left. Since we're painting on the layer mask, not on the layer itself,
we won't see the black brush strokes. Instead, the light rays will
simply disappear in the areas we paint over:

Painting over areas to hide the rays of light.
If you need a larger or smaller brush, you can change its size from the keyboard. Press the left bracket key ( [ ) repeatedly to make the brush smaller or the right bracket key ( ] ) to make it larger. If you hold down your Shift key as you press the bracket keys, you'll make the brush edge softer (left bracket key) or harder (right bracket key).
I also need to hide the light rays from in front of the couple, so I'll paint over them with a smaller brush:
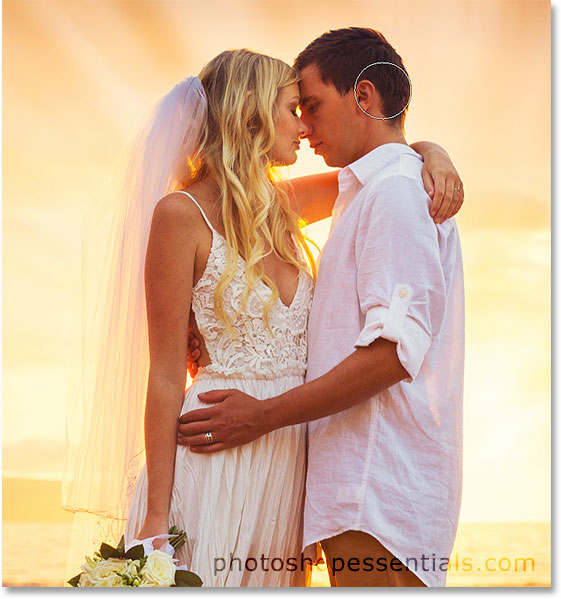
Using a smaller, soft brush to paint away the light rays in front of the two people.
Viewing The Layer Mask
As I mentioned, because we're painting on the layer mask, not on the
layer itself, we don't see the black brush strokes as we paint, but we can see where we've painted by looking at the mask preview thumbnail
in the Layers panel. The black areas are where we're hiding the light
rays from view. The white areas are where the light rays are still
visible:
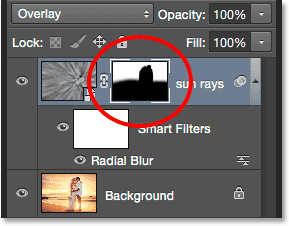
The mask preview thumbnail shows us where we've painted.
Or, for a full-size preview of the layer mask to see exactly where you've painted, press and hold the Alt (Win) / Option (Mac) key on your keyboard and click on that same mask preview thumbnail. Your image in the main document area will be replaced by the layer mask:
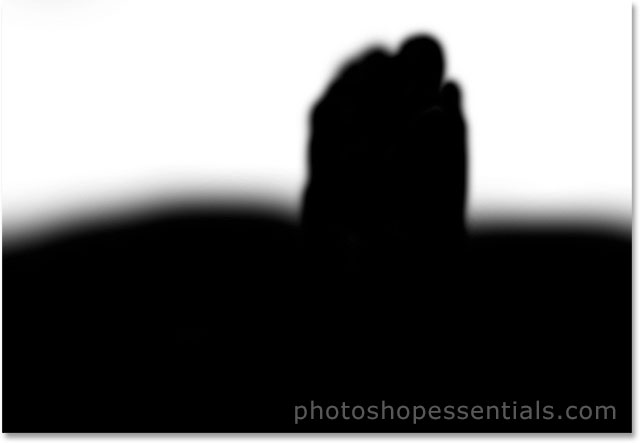
Alt (Win) / Option (Mac)-click on the mask preview thumbnail to toggle between viewing the image and viewing the mask.
To switch back to your image, press and hold the Alt (Win) / Option (Mac) and click again on the mask preview thumbnail
in the Layers panel. Here's what my effect looks like with the rays of
light now appearing only above the horizon, behind the couple:
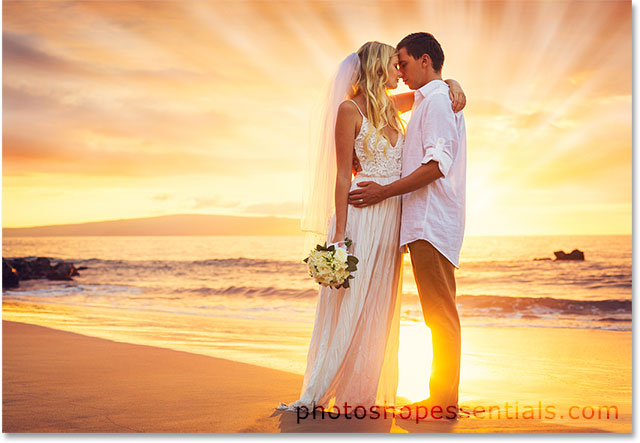
The effect after selectively hiding the light rays with the layer mask.
Step 13: Add A Photo Filter Adjustment Layer
The only problem remaining is that my light rays are white. I'd like
to warm them up so they better match the warmth of the rest of the
image. For that, I'll use a Photo Filter adjustment layer. To add one,
press and hold your Alt (Win) / Option (Mac) key while clicking the New Fill or Adjustment Layer icon at the bottom of the Layers panel:
Alt (Win) / Option (Mac)-clicking the New Fill or Adjustment Layer icon.
Then I'll choose Photo Filter from the list that appears:
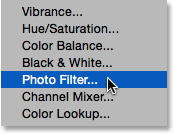
Choosing a Photo Filter adjustment layer.
This opens the same New Layer dialog box we saw earlier. Select the Use Previous Layer to Create Clipping Mask
option by clicking inside its checkbox. This tells Photoshop to "clip"
the adjustment layer to the "sun rays" layer directly below it, which
means that the Photo Filter will affect just that one layer, not the
entire image.
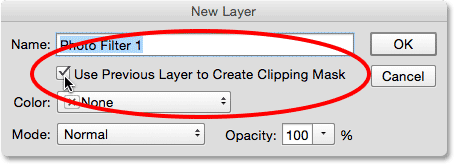
Selecting "Use Previous Layer to Create Clipping Mask" option.
Click OK to close out of the dialog box. Photoshop adds the Photo
Filter adjustment layer directly above the "sun rays" layer. Notice that
the adjustment layer is indented to the right, with a small arrow
pointing down at the layer below it. This tells us that the Photo Filter
is clipped to the "sun rays" layer:
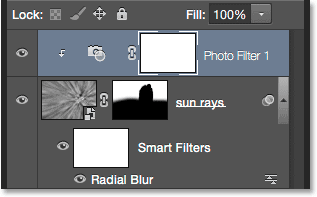
The new Photo Filter adjustment layer.
Step 14: Select The Warming Filter (85) And Increase The Density
The options and controls for the Photo Filter adjustment layer appear in Photoshop's Properties panel. Set the Filter option at the top to Warming Filter (85) if it isn't set to that already. Then, drag the Density
slider towards the right to warm up the sun rays. The further to the
right you drag, the warmer the rays will appear. I'm going to set mine
to a value of around 85%. Make sure to leave the Preserve Luminosity option selected (checked):
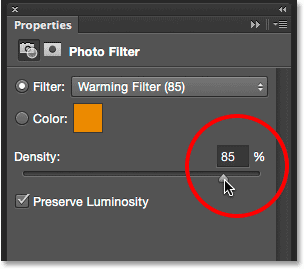
Choosing the Warming Filter (85), then increasing the Density.
With the Density value increased, the rays of sunlight have warmed up nicely to match the rest of the image:
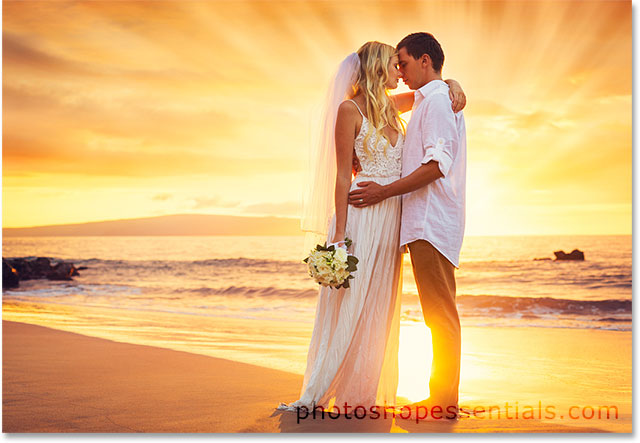
The effect after warming up the light rays with the Photo Filter.
Step 15: Lower The Opacity Of The Sun Rays
Finally, if you find that your sun rays are too bright, first click on the "sun rays" layer in the Layers panel to select it:
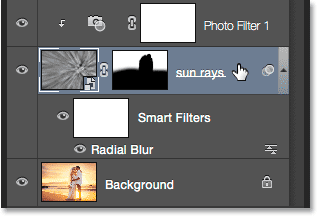
Selecting the "sun rays" layer.
Then, simply lower the opacity of the layer to reduce the intensity of the rays. The Opacity option is found in the upper right of the Layers panel, directly across from the Blend Mode option. I'll lower mine down to 80%:
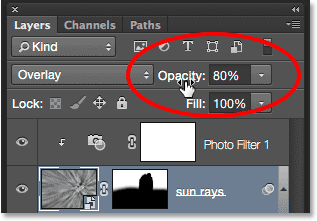
Lowering the opacity of the "sun rays" layer.
And with that, we're done! Here, after lowering the opacity, is my final "rays of sunlight" effect:
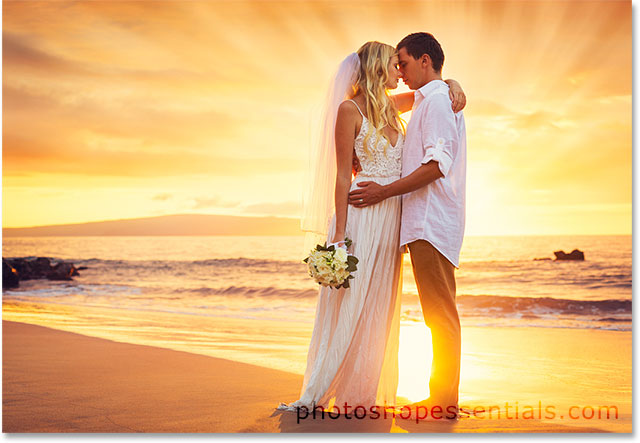
The final result.
No comments:
Post a Comment