In this Photo Retouching tutorial, we'll learn a very simple technique for changing someone's eye color in a photo using a Hue/Saturation adjustment layer! Of course, there's no shortage of ways to change colors in an image with Photoshop,
but whether you know which color you want to use or just want to play
around and experiment, a Hue/Saturation image adjustment makes changing
eye color easy, fast and fun!
This version of the tutorial is for Photoshop CS5 and earlier.
Photoshop CS6 and CC users will want to follow along with our updated Changing Eye Color in Photoshop tutorial.
Here's the image I'll be using:

The original image.
Let's get started!
Step 1: Zoom In On The Eyes
Before we begin, let's make it easier to see what we're doing by zooming in on the eyes in the photo. Select the Zoom Tool from the Tools palette, or press the letter Z on your keyboard to select it with the shortcut:

Select the Zoom Tool.
With the Zoom Tool selected, click and drag out a selection box around the eyes. This is the area we'll be zooming in to:
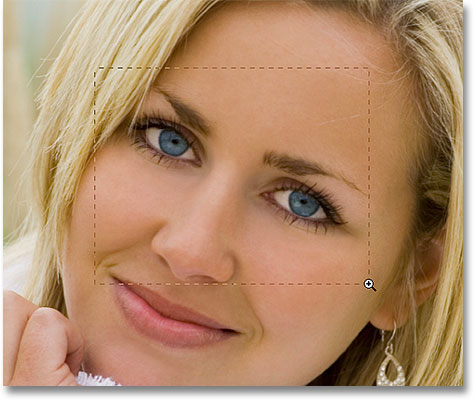
Drag out a selection box around the eyes.
Release your mouse button, and Photoshop fills the document window with the area you selected:
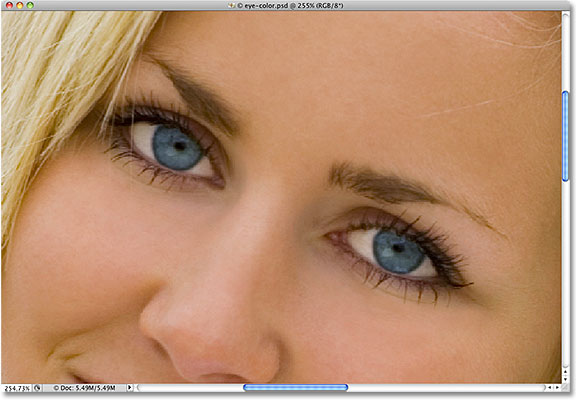
Photoshop zooms in on the selected area.
Step 2: Select The Lasso Tool
Next, we need to select the eyes so we're not affecting any other areas of the image. For that, we'll use the Lasso Tool. Select the Lasso Tool from the Tools palette, or press the letter L on your keyboard to quickly select it with the shortcut:

Select the Lasso Tool.
Step 3: Draw Selections Around The Eyes
With the Lasso Tool selected, drag a selection around one of the
eyes. Don't worry if your selection outline isn't perfect since we'll
clean things up later. Once you have the first eye selected, hold down
your Shift key and draw a selection around the other
eye. Holding down the Shift key will add the new selection to the
previous one, allowing us to select both eyes at once:
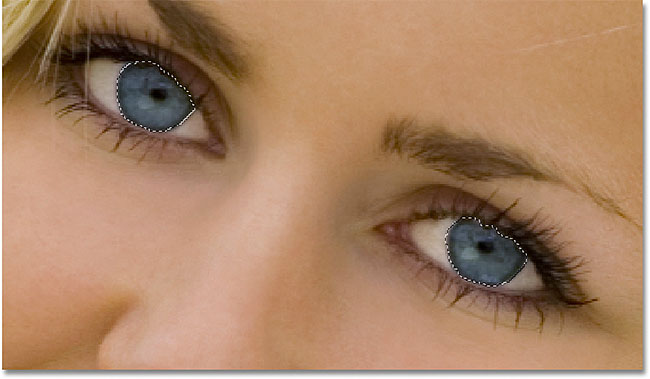
Select the first eye, then hold down Shift and select the other.
We don't need the pupils in the center of the eyes selected, so let's remove them from the selection. Hold down your Alt (Win) / Option
(Mac) key and drag around each pupil with the Lasso Tool. This will
remove them from the selection, leaving us with only the colored area
selected. Again, don't worry about being overly precise for now:

Hold down Alt (Win) / Option (Mac) and drag around the pupils to deselect them.
Step 4: Add A Hue/Saturation Adjustment Layer
With the eyes now selected, we're ready to change their color! For
that, we'll use a Hue/Saturation adjustment layer. Click on the New Adjustment Layer icon at the bottom of the Layers palette (it's the circle split diagonally between black and white), then select Hue/Saturation from the list of adjustment layers that appears:
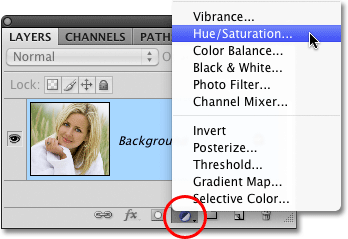
Click on the New Adjustment Layer icon and choose Hue/Saturation from the list.
Step 5: Select The "Colorize" Option
If you're using Photoshop CS4 as I am here, the options and controls for the Hue/Saturation dialog box will appear inside the Adjustments Panel which is new to CS4. In Photoshop CS3 and earlier, a Hue/Saturation dialog box will appear on your screen. Select the Colorize option by clicking inside its checkbox:
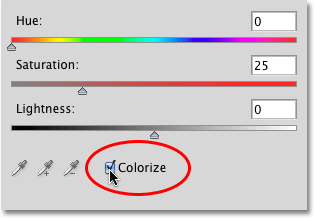
Select "Colorize".
As soon as you select Colorize, you'll see the eyes change color in the document window:
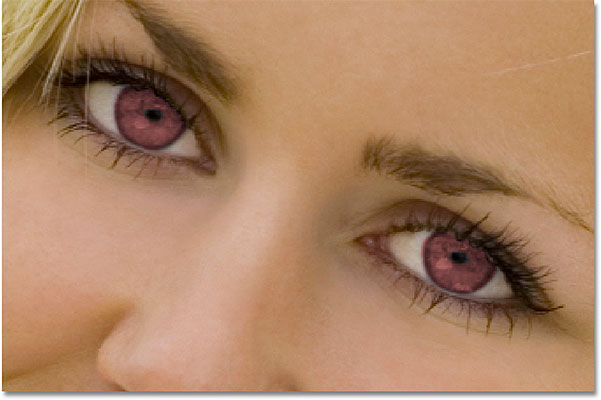
The eyes instantly change color.
Step 6: Adjust The Hue, Saturation And Lightness
To change the color, simply adjust the Hue, Saturation and Lightness
options by dragging their sliders left or right. Hue will change the
basic color, Saturation changes the saturation of the color, and
Lightness affects the overall brightness. Be careful not to drag the
Saturation or Lightness sliders too far to the right, though, since
things can quickly become unnatural looking. The image in the document
window will continually update as you move the sliders so you can see a
live preview of the changes:
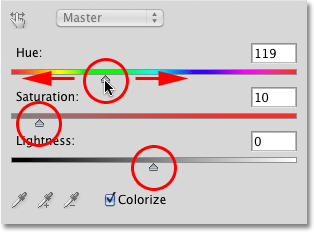
Dial in the color you want with the Hue, Saturation and Lightness sliders.
When you're happy with the new color of the eyes, click OK to exit
out of the Hue/Saturation dialog box (Photoshop CS4 users can leave the
Adjustments Panel open since there's no need to close it). Here's my
image after changing the woman's eyes from blue to green:
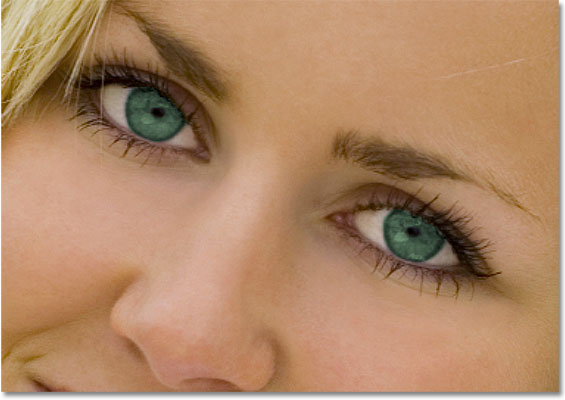
The Hue/Saturation adjustment makes it easy to select any color you want for the eyes.
Step 7: Select The Brush Tool
If your initial selection of the eyes with the Lasso Tool wasn't
perfect, cleaning things up is as easy as painting with a brush! Select
Photoshop's Brush Tool from the Tools palette, or press the letter B to select it with the keyboard shortcut:

Select the Brush Tool.
Step 8: Select The Hue/Saturation Layer Mask
If we look in our Layers palette, we see our Hue/Saturation
adjustment layer sitting above the image on the Background layer. One of
the great things about adjustment layers is that they include a built-in layer mask,
which makes it easy to control exactly which areas of the image are
affected by the adjustment layer and which are not. All we need to do is
paint on the layer mask with our brush, but first, we need to make sure
the layer mask is selected. You should see a white highlight border
around the layer mask's thumbnail, which means the mask is selected. If
you don't see the highlight border, simply click directly on the
thumbnail to select the mask:
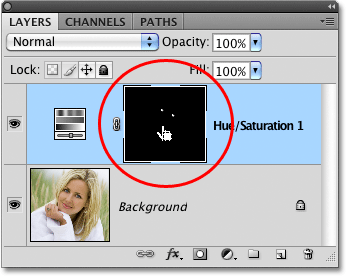
Make sure the layer mask for the adjustment layer is selected.
Step 9: Paint On The Mask To Clean Up The Selection
To clean up the eyes, simply paint over any problem areas with your
brush. Paint with white to add to the area that the Hue/Saturation
adjustment layer is affecting, or with black to hide the effects of the
adjustment layer. Photoshop paints using your current Foreground color,
which you can see by looking at the Foreground color swatch near the bottom of the Tools palette:

The Foreground color swatch shows the color you're painting with.
With the layer mask selected, press the letter D on your keyboard to reset your Foreground color to white. To quickly switch to black, press the letter X, which swaps the Foreground and Background colors. Press X again to switch back to white.
To change the size of your brush, use the left and right bracket keys on your keyboard. Press the left bracket key ( [ ) repeatedly to make the brush smaller or the right bracket key ( ] ) to make it larger. Press Shift+left bracket to make the brush edges softer if needed, or Shift+right bracket to make them harder.
Here, I'm painting around the outer edge of one of the eyes with a
small brush, with black as my Foreground color, to hide any areas where
the new green color extended out into the white part of the eye:
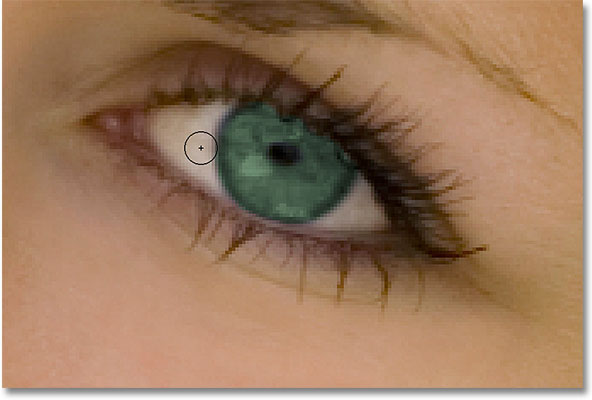
Painting with black on the layer mask to remove any unwanted green areas.
Here, after cleaning up the effect by painting on the layer mask, is my final result:

Her blue eyes are now green. No special contact lenses required.
Интересно
ReplyDelete